
Tileset Editor
A Tileset stores reusable tile images and per-tile properties. A Scene’s Tile Layers store painted cells that reference a Tileset and tile index. Cutting a sheet prepares the choices in the palette; painting creates the map. Neither operation creates Object instances for each tile.
Prerequisites
- An open project with playtest stopped, a Tileset resource, and an existing 2D Scene.
- Artwork with known cell dimensions, borders, and gaps.
- For a controlled check, the 64 × 64 four-cell sheet. Its layout is two columns and two rows of 32 × 32 tiles, with no outer margin or spacing.

Create a Tileset from Add, or open one from the Resource Tree. The example names it Terrain.
Import and Cut a Regular Sheet
- Open
Terrainand choose Import/Create in Tileset Editor Modes. - Choose Import, set Source Type to Tileset / Single Image, and select Import Single Image….
- Choose the sheet and inspect its Source filename and full preview.
- Switch to Tile Cutting.
- Set Slicing Mode to Grid, Columns to
2, Rows to2, Margin to0, and Spacing to0for the supplied sheet. - Inspect the boundaries. Use Home to restore a manageable preview scale if a portion of the sheet is outside the visible canvas.
Expected result: four complete 32 × 32 tiles. Tile indices begin at 0 and run across the first row before continuing to the next row. The upper-right tile is Tile #1.
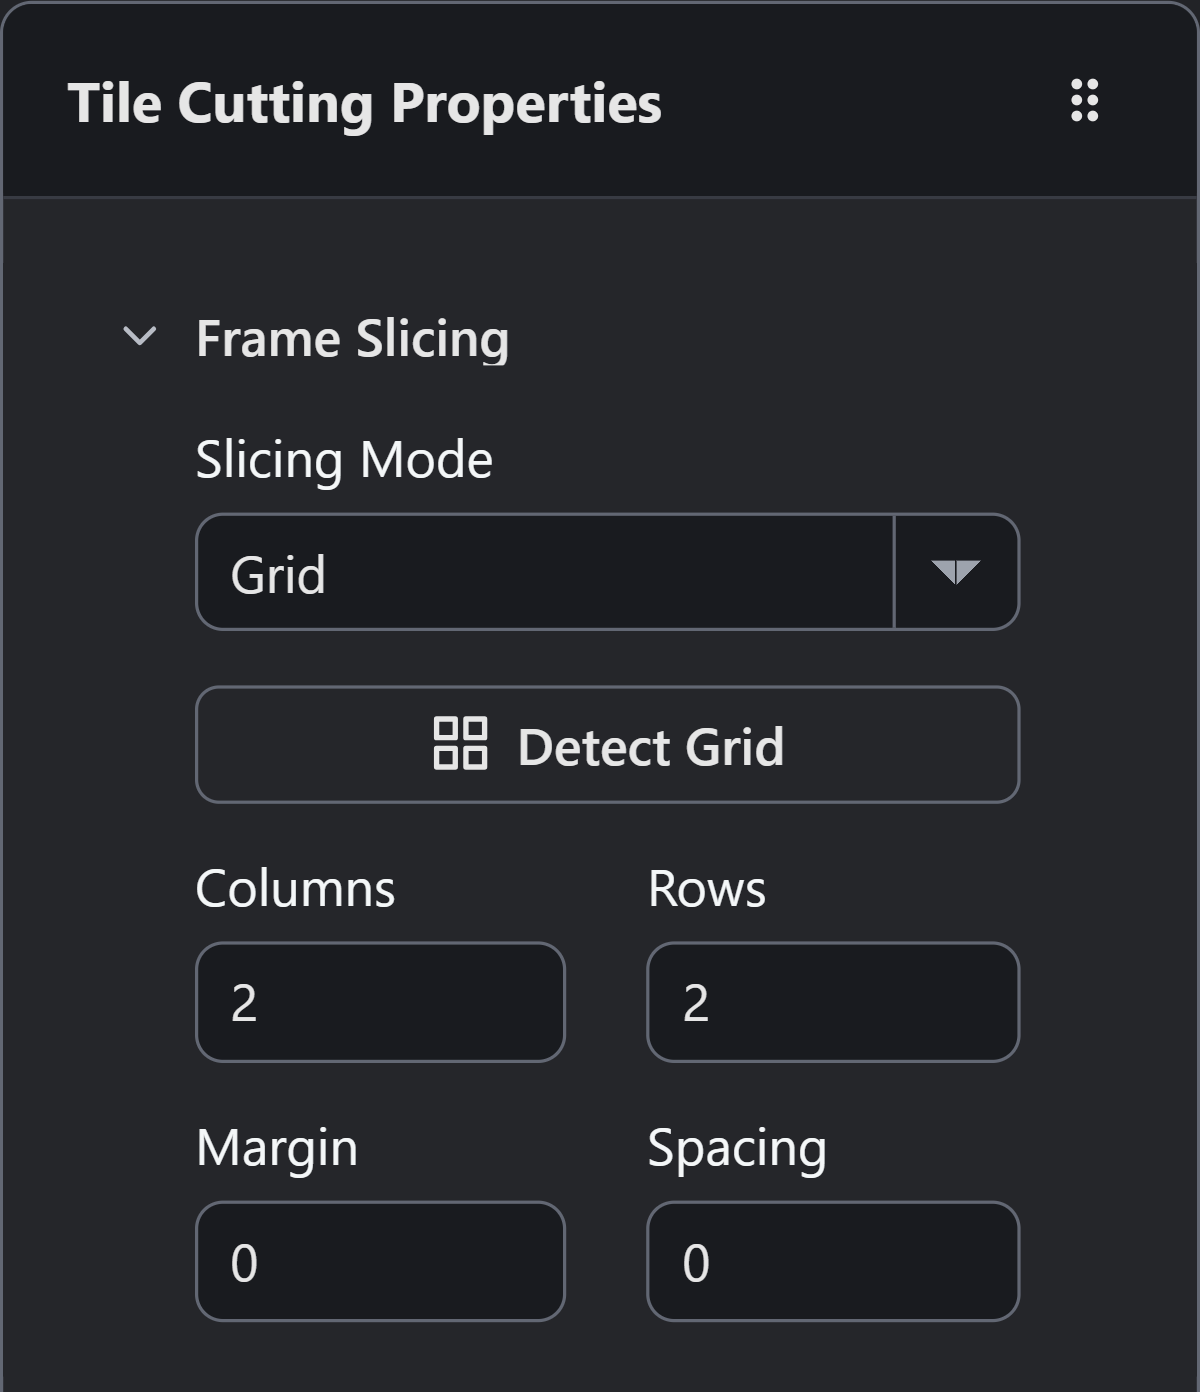
- Columns: 2
- Rows: 2
- Spacing: 0 source pixels
Columns and Rows describe the source arrangement. Margin and Spacing are source-image pixels, not Scene world units. Detect Grid provides an estimate; opaque sheets or decorative borders can require manual correction. Custom Rectangles handles irregular cells that cannot be described by one uniform grid.
Import/Create also supports Image Sequence and Multiple Sprite Sheets. Check source ordering and frame geometry after combining files. Create prepares blank tile artwork for Pixel Editor. Export Tileset Sheet exports the sheet; Export Tiles Individually produces separate tile images.
Define a Collidable Tile
- In Tile Cutting, activate Select Frames if another cutting tool is active.
- Click the upper-right tile in the canvas. Confirm Tile #1 in Tool Options > Tile Properties.
- Enable Collidable.
- Keep Collision Shape > Collider at Whole Cell for the first check.
- Set Gameplay Type to
Groundand retain Scatter Weight1.
Expected result: the selected tile retains its collision flag and Gameplay Type. Selecting another tile shows that tile’s properties; it does not transfer the edited properties automatically.
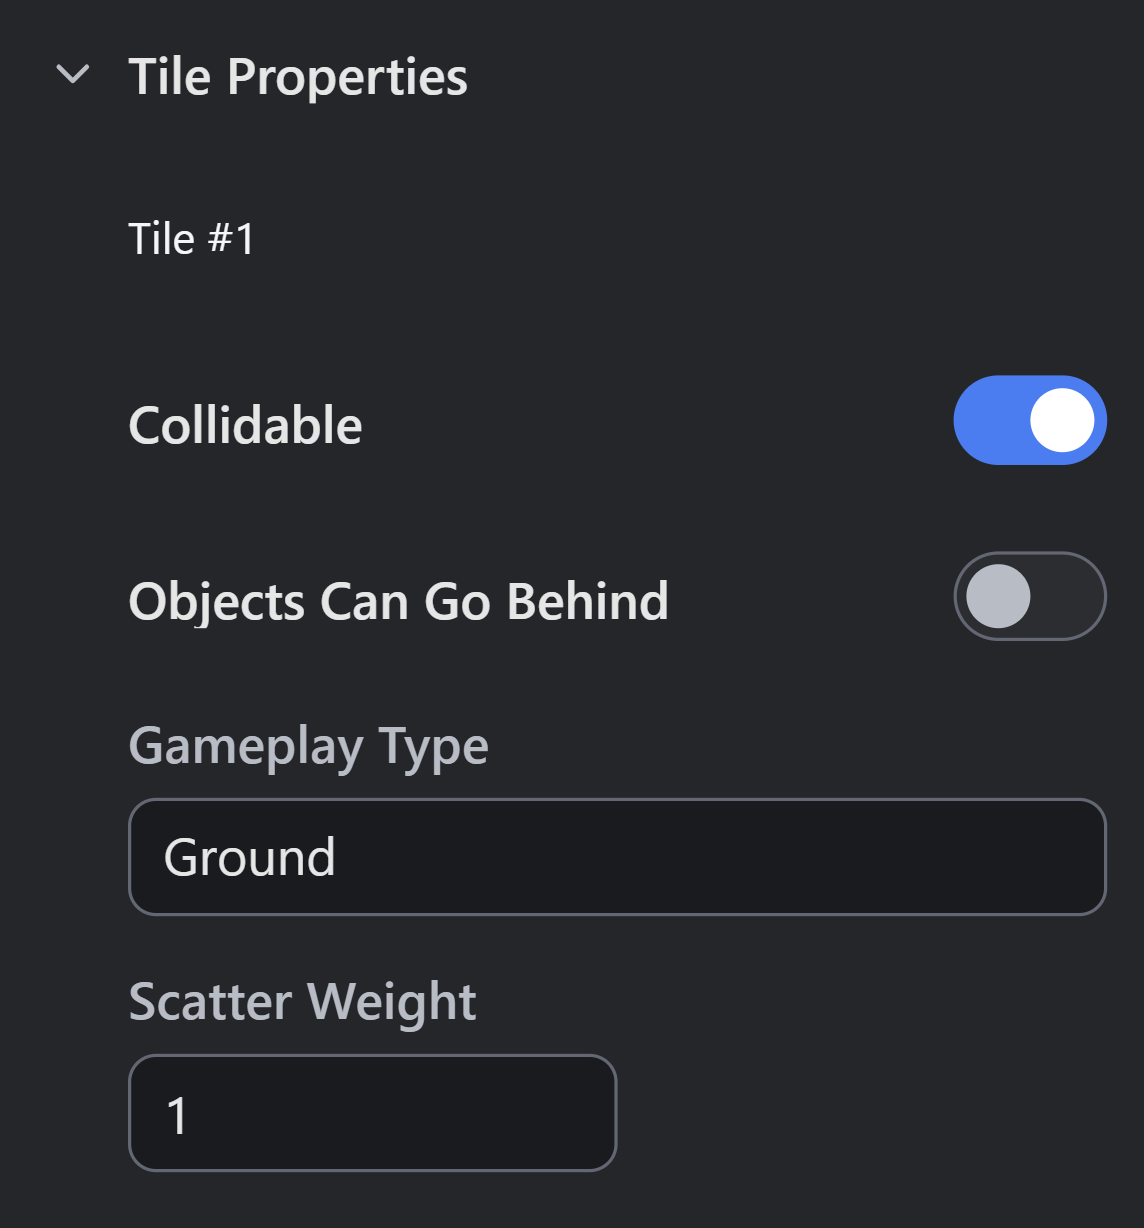
- Collidable applies to the selected tile.
- Gameplay Type: Ground
- Scatter Weight: 1
| Property | Meaning and Interaction |
|---|---|
| Collidable | Marks the tile as movement-blocking. Runtime contact also depends on the moving Object’s Collider and movement/physics behavior. |
| Collider | Whole Cell, One-Way Platform, Custom Box, or Rounded Box. Choose geometry appropriate to the occupied part of the tile. |
| Custom collider fields | Express offsets and dimensions as percentages of the tile cell. Recheck contact after changing Scene cell size. |
| Objects Can Go Behind | Marks foreground tiles for drawing above normal-depth Objects. It changes presentation, independently of collision. |
| Gameplay Type | An authored tag such as Ground or Lava. It identifies a tile for gameplay queries; the text alone does not cause damage or movement behavior. |
| Scatter Weight | Relative selection weight for scattering; default 1. It does not change the ordinary single-tile Paint choice. |
Use one tile at a time for the initial check. A multiple selection can show Mixed properties; changing such a control applies to the selected set.
Paint Tiles Into a Scene
- Open the Scene and choose Tile Mode in Scene Editor Mode.
- In Tile Tree, select an editable layer such as
World, or select Add Tile Layer to create one. - Activate Paint. Its left Tool Options panel exposes Tileset.
- Choose
Terrain, then click the upper-right cell in the palette. - Click or drag in the Scene preview to paint on the active Tile Layer.
- Switch to Select and inspect the selected layer’s Properties. Check its name, visibility, opacity, Z-Index, and Use Scene Tile Size.
Expected result: the upper-right artwork appears in the painted cell. The Scene retains Terrain and tile index 1 for that cell. The source image remains unchanged.
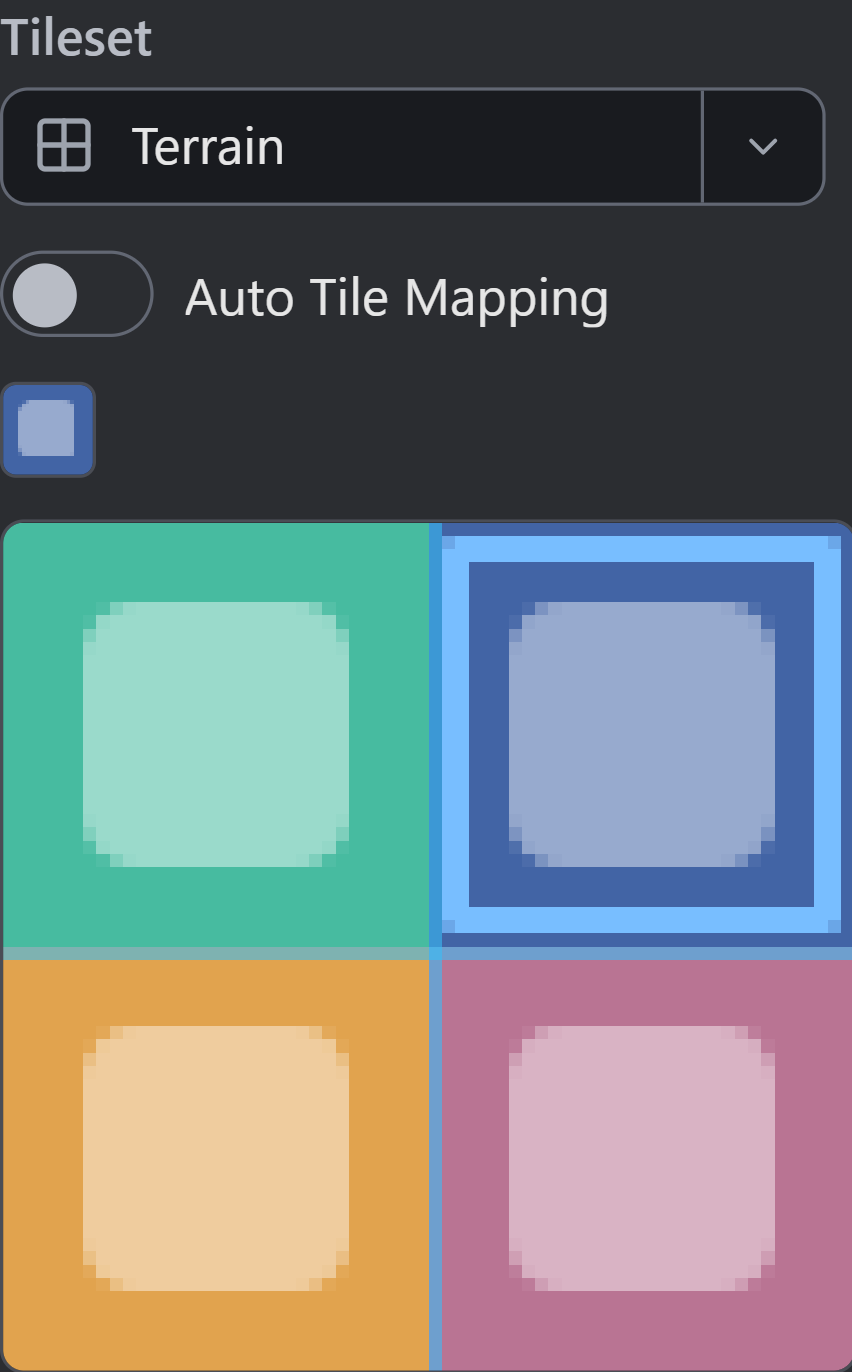
- Tileset: Terrain
- Select a palette cell before painting the active Tile Layer.
Source tile pixels and map cell world size are separate. Use Scene Tile Size inherits the Scene’s geometry; disabling it permits layer-specific Tile Width and Height in world units. Offsets move the layer’s grid. Changing layer geometry resizes or moves existing cells without renumbering their tile references.
Eyedrop chooses an existing painted tile. Erase removes cells from the active layer. Fill and paint variations operate over larger areas; check the active layer and use Undo when reviewing an accidental operation. A locked layer prevents editing. Editor eye controls affect inspection; layer visibility and opacity also require a game-run check.
Animation and Auto Tile Mapping
In Tile Cutting, Animated Tile and Open Animation Workbench configure a sequence for the selected base tile. Animation mode also offers Add Animated Tile. The base tile index remains the placement identity while its displayed frames change. Check frame order and duration in milliseconds, then verify a painted cell in playtest. The shared Sprite Animation guide explains timeline operations; animated tile names are fixed to their base index.
Auto Tile Mapping is a separate mode for authoring terrain clusters. Scene Paint exposes the matching Auto Tile Mapping option. Leave it disabled when verifying ordinary single-tile painting. Correct mapping requires a compatible authored pattern; the engine cannot infer complete terrain rules from four unrelated pictures. Follow Auto Tile Mapping to define Adaptive Shape, Shape Detail, and Repeat Inside patterns, then check the changing border in a Scene.
Verify Collision and Updates
Place an Object with an enabled Collider next to the painted collidable tile. Use the game’s intended movement method to approach it from each relevant direction. Verify contact at the visible tile boundary, including the permitted side of a one-way platform. Tile collision does not follow solely from the image’s opaque pixels.
Save and reopen the project, then inspect the palette selection, tile metadata, and painted map. Preserve source layout when reimporting. Reordering cells or changing grid counts can change which artwork an existing index refers to; inspect all dependent Scenes before accepting that replacement.
Troubleshooting
| Symptom | Diagnosis and correction |
|---|---|
| Painting produces no cell | Choose Paint, a Tileset and palette tile; select an unlocked active Tile Layer. |
| Wrong tile is painted | Check the palette’s selected cell and Auto Tile Mapping setting. |
| Neighboring artwork appears at tile edges | Correct source Margin, Spacing, and cell geometry before changing Scene sizing. |
| Collidable tile does not block an Object | Confirm the painted index, Collidable flag, enabled Object Collider, and movement method. |
| Character disappears behind a tile | Inspect Objects Can Go Behind and layer Z-Index. |
| Reimport changes an existing map | Compare source index ordering and slicing with the earlier layout; restore it or deliberately repaint affected cells. |
See Scene Editor, Collision, and Coordinates.
Myth Engine Documentation