
Workspace Overview
Open a Scene to see the Objects placed inside it. The preview shows your authored content. Select a placement in Scene Explorer, then inspect its Properties before changing it.
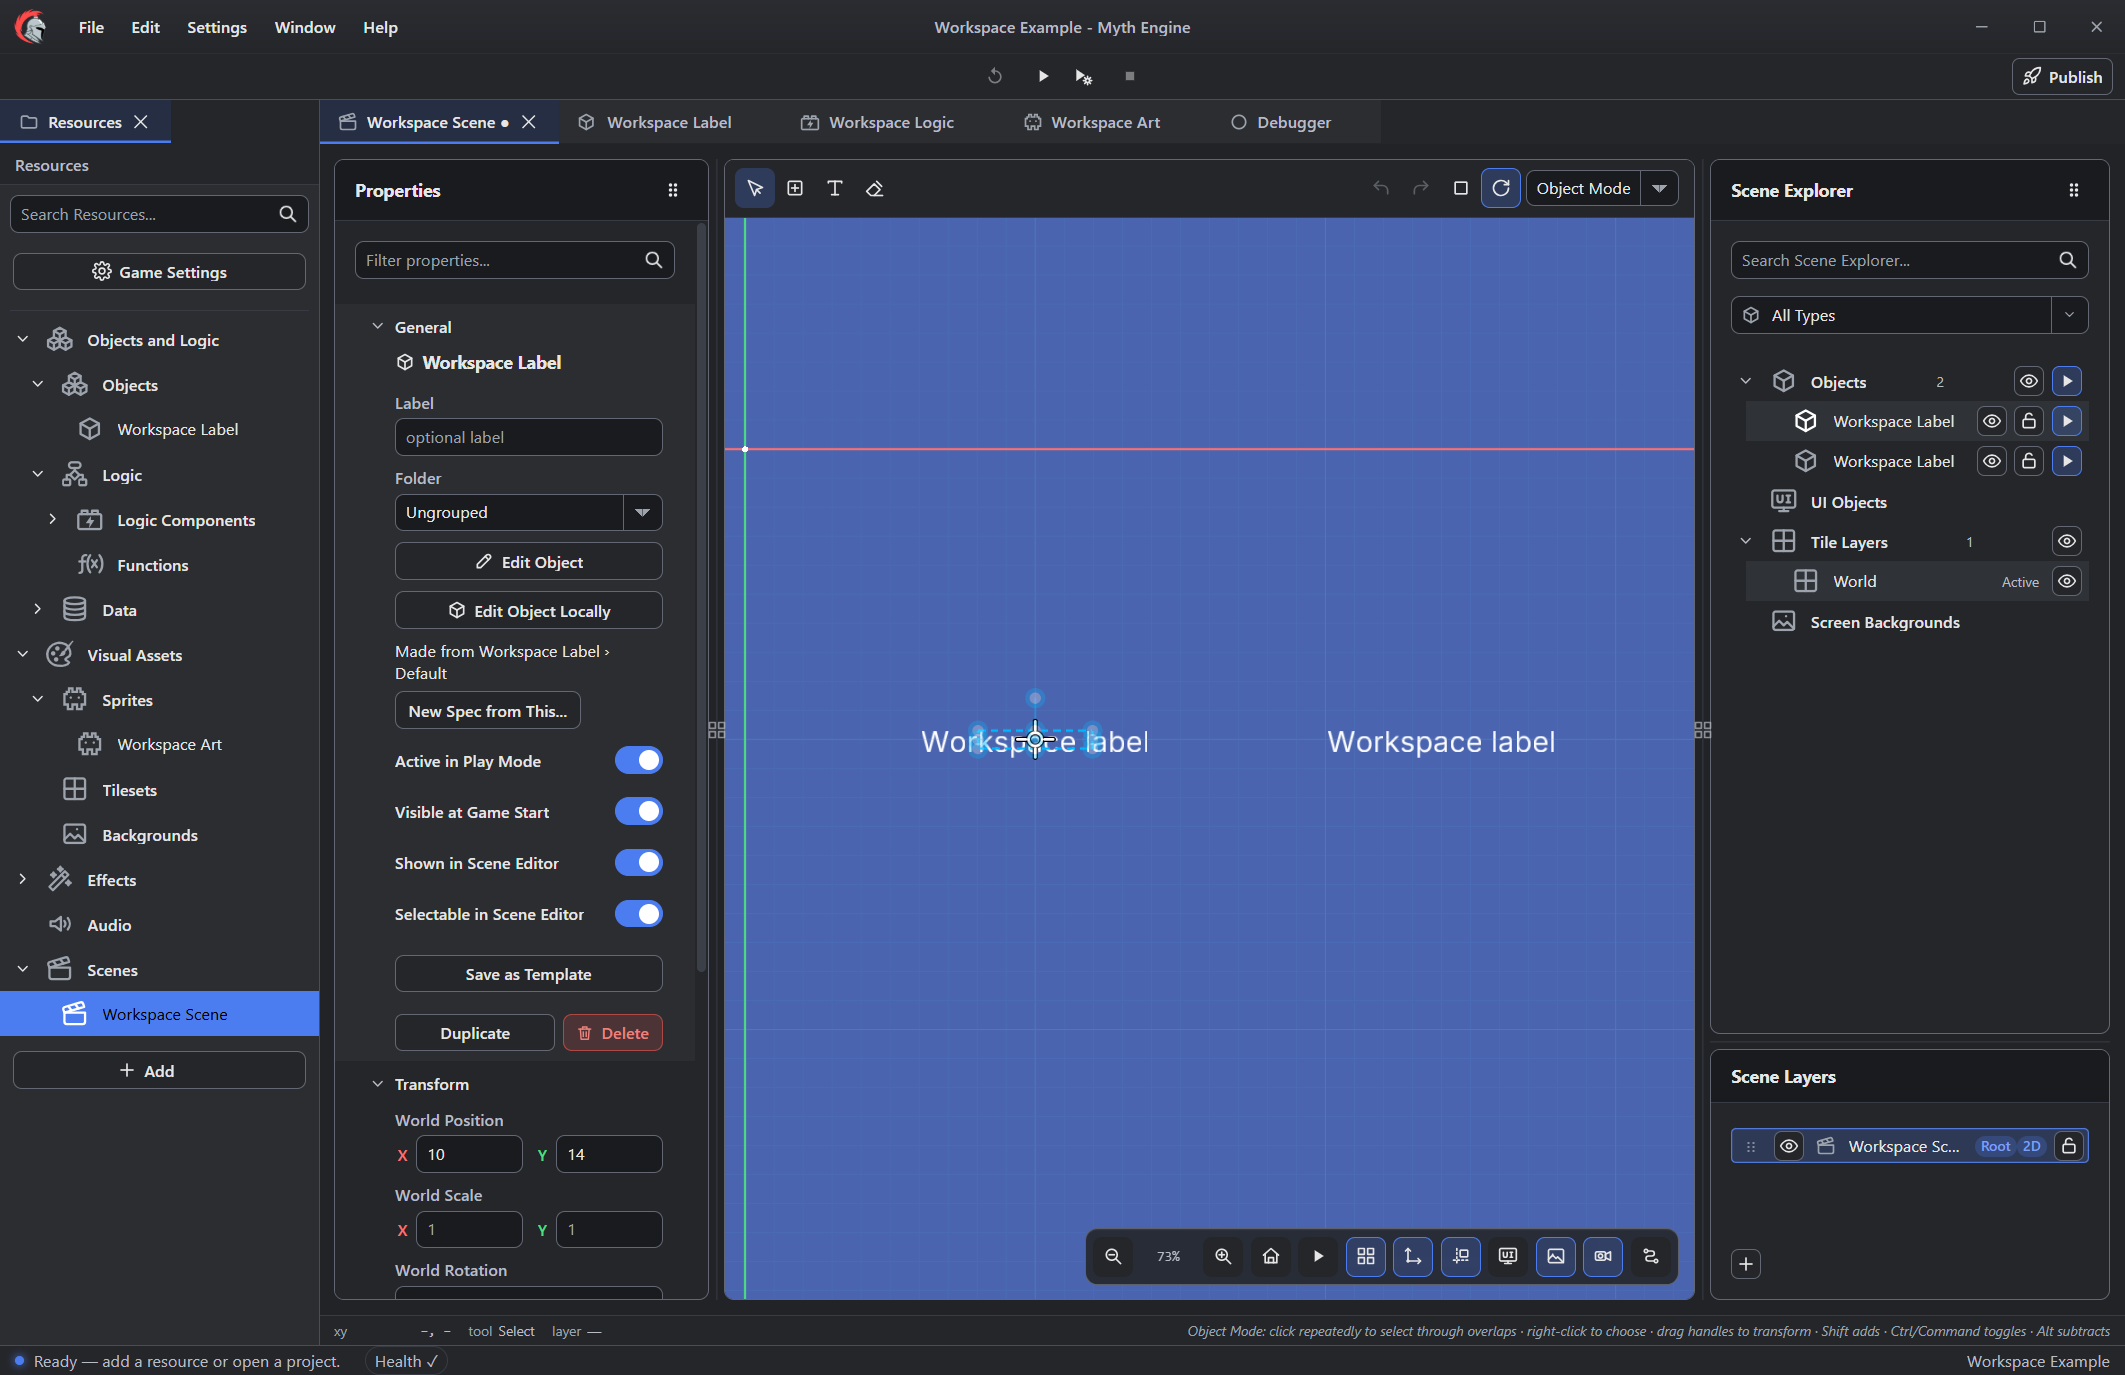
- Resources holds your project’s reusable items.
- Document tabs switch between open editors.
- Properties follows the current editing target, such as the placement selected here.
- The Scene preview shows placed content.
- Scene Explorer lists Scene content so you can select overlapping placements.
- Playtest controls start, pause, resume, and stop the game.
Open Resources and Editor Documents
Start with an open project, such as one from the Installation guide. Its initial Scene can be empty.
Expand Scenes in the Resource Tree. Double-click a Scene to open its editor document, then keep that tab open while you explore. For artwork, expand Visual Assets > Sprites and double-click a Sprite resource.
Click a document tab to switch editors. To close an editor, right-click its tab and choose Close. The resource stays in your project. You can reopen it from the Resource Tree whenever you need it.
Choose Add in Resources. Add Resource lists the available types, including separate Logic Component and Function choices. Use Filter Resource Types to search the list before choosing the kind of resource you want to add.
Choose the Editing Target
Click Select above the Scene preview. Then choose a placement in Scene Explorer. Its Properties appear beside the preview, including a heading with the Object’s name.
Changing World Position moves that occurrence. Other placements keep their positions. To inspect the reusable definition, expand Objects and Logic > Objects and double-click its Object resource.
Check the document tab and the Properties heading to confirm the editing target before making a change. A Scene occurrence and its reusable definition are different editing targets. Read Objects and Components for shared defaults, Scene-local definitions, and placement overrides that belong to one occurrence.
Scene Explorer also helps when Objects overlap. Choose the intended occurrence there, then check its name and Properties before changing it.
Save and Playtest
Press Ctrl+S to save the project. Choose Play, or press F5, to start its Start Scene in a game window.
While the game runs, the Play button changes to Pause. Pause it, then use Resume to continue that run. F5 also pauses and resumes.
Stop ends the run and returns you to authoring. Press F6 to open the Debugger alongside your other editor documents. Click the Scene tab to return.
Default Windows Shortcuts
| Shortcut | Editor Command |
|---|---|
| Ctrl+N | New Project |
| Ctrl+O | Open Project |
| Ctrl+S | Save Project |
| Ctrl+Shift+S | Save Project as |
| Ctrl+Z | Undo |
| Ctrl+Y or Ctrl+Shift+Z | Redo |
| F5 | Run, pause, or resume the game |
| F6 | Open Debugger |
| F1 | Open online documentation |
| Shift+F11 | Focused Mode |
Shortcuts depend on focus. When you’re editing text, Undo applies to that field. Select the Scene or a resource before using its editor commands.
To check or customize bindings, open Settings > Edit Keyboard Shortcuts… and choose the Global shortcut scope. The list shows application commands. Gameplay input Commands have separate settings in Player Commands and Input.
For a worked project, Weighted Maze, Set Up uses the Resource Tree, Scene Properties, and Game Settings together.
Myth Engine Documentation