
Player Commands and Input
The Input Manager maps physical inputs to named, typed Commands. A Command describes a gameplay operation, such as Move or Confirm; an Input Context selects the Commands and mappings currently available. Listen for Command Events in Logic so the same behavior works with each mapped device.
Mercury 1.0.1 exposes keyboard and mouse authoring in this workspace. Older projects can retain gamepad mappings understood by the runtime. Gamepad binding and analog tuning controls are not exposed here; keyboard setup instructions do not establish gamepad support for a particular game.
Prerequisites
- An open project and a stopped playtest.
- An enabled, compatible Logic attachment on an Object placed in the startup Scene.
- A saved checkpoint before editing shared Commands or clearing mappings.
Open Game Settings > Input Manager. Input Manager Mode selects Physical Buttons, Command Set, or Input Sequences. These are editor workspaces; switching mode does not activate a gameplay context.
Choose the Event Contract
| Interaction | Event | Important Behavior |
|---|---|---|
| One operation when a Button activates | Command Pressed | Suitable for confirmation, a single shot, or a Scene change. |
| Repeated behavior while a Button is active | Command Held | Can run repeatedly; avoid unrestricted resource creation on every invocation. |
| One operation when a Button stops | Command Released | Requires a preceding active sample. |
| A Button’s value changes | Command Changed | Responds when the Button value changes. |
| A complete axis sample, including neutral | 1D Axis Input or 2D Axis Input | Use the matching typed Command. Neutral samples can clear movement. |
| A particular half or direction | 1D Half or 2D Direction Events | Select both the Command and the half/direction. |
See Input Events for available Event fields. Input Type controls the eligible Command chooser; a Button Command cannot supply a 2D Axis Event.
Create a Button Command
- Choose Command Set and select Default. Use its Edit control to rename Input Context Name to
Gameplay, then select Save Input Context. The remaining examples use this context name. - Select Add Command. Enter
Advanceas Command Name, choose Button as Input Type, and confirm Add Command. Command names must be unique. - Expand Advance if its mappings are collapsed. A new Command can already contain an unassigned mapping row. Use that row first; Add Keybinding adds another row when needed.
- Activate the row’s physical-input recorder and press and release
N. Inspect the committed mapping; an unassigned draft is not a working binding. - In the attached Logic, add Command Pressed, select Advance, keep Press Pattern: Single Press, and add Print Debugger Message with a recognizable message.
- Start Debug Play, focus the game, press N once, hold it, and release it. Repeat after saving and reopening the project.
Expected result: one Pressed diagnostic at each inactive-to-active transition. Holding the key should not repeatedly execute the Pressed workflow. Held and Released are separate contracts.
Button bindings can record chords with up to four physical inputs. Axis-direction bindings use individual inputs. Recording an editor binding differs from building an in-game remapping interface; Control Command Rebinding and Reset Command Bindings have their own runtime behavior.
Configure a 2D Movement Command
- In the selected context, add
Movewith Input Type: 2D Axis. - Record four bindings. Set each row’s Command Direction before recording its physical key.
| Command Direction | Physical Key |
|---|---|
| Left | Left Arrow |
| Right | Right Arrow |
| Up | Up Arrow |
| Down | Down Arrow |
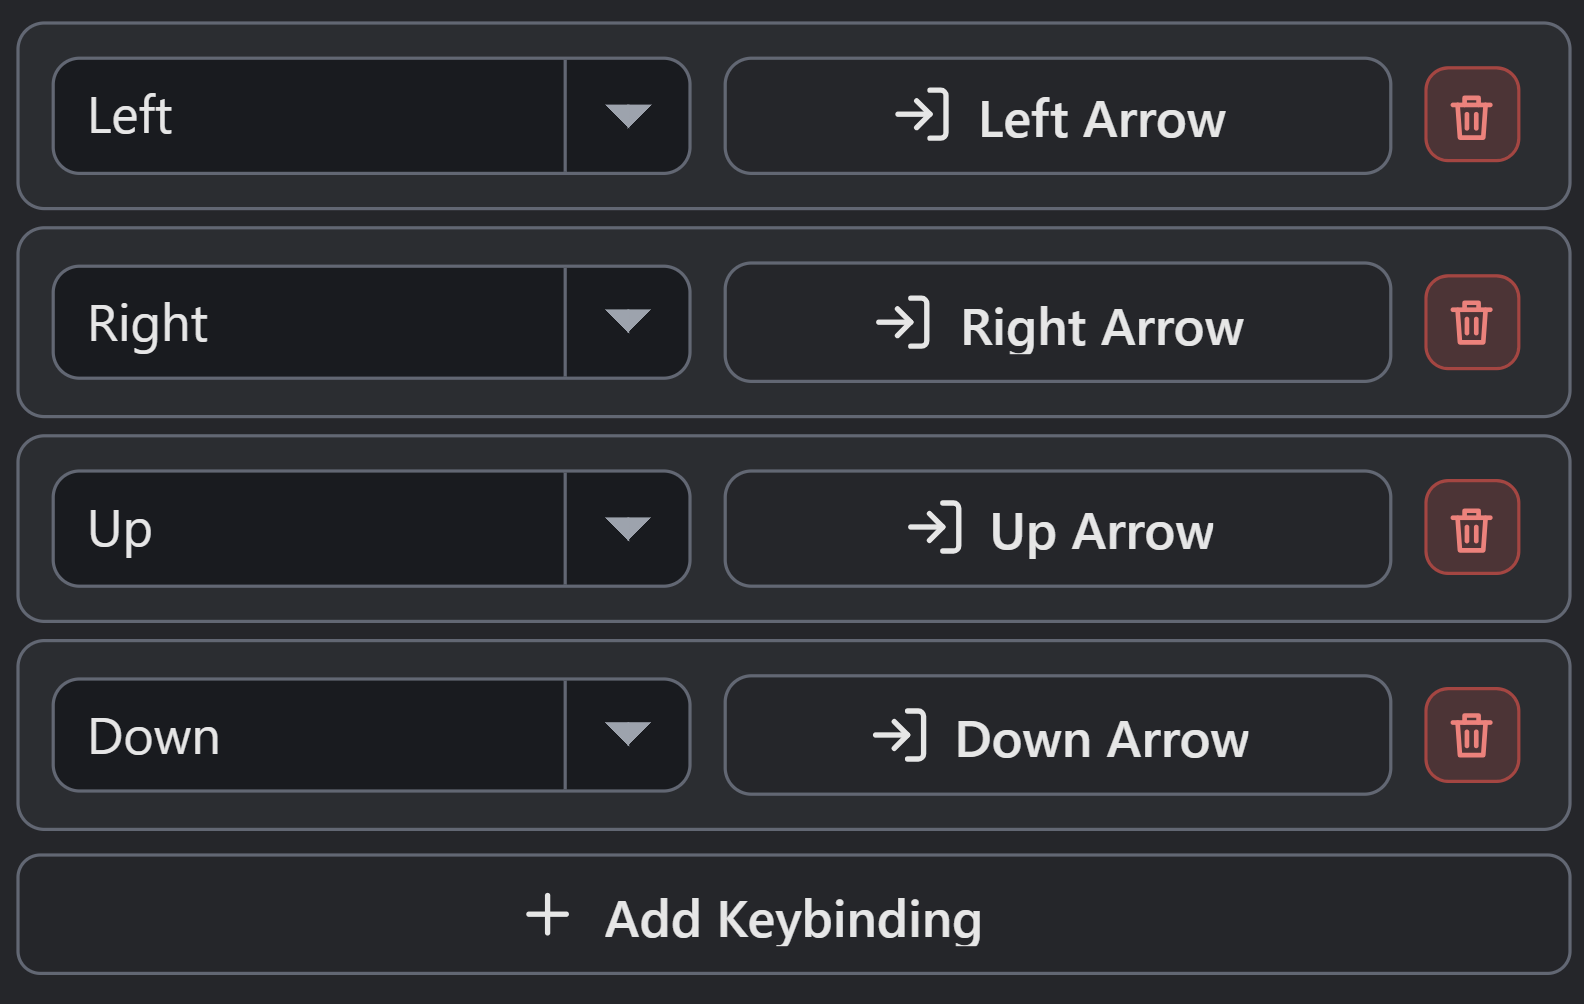
- Each recorded key has an explicit Command Direction.
- Add Keybinding adds an unassigned row; recording commits the physical input.
- In the Object’s attached Logic, select 2D Axis Input > Move and configure Set Velocity for Self:
X Velocity: event.axisVector.x * 3Y Velocity: event.axisVector.y * 3Enter the values through expression controls and typed Event completion. The vector is length-limited and includes zero. World speed is 3 metres per second; velocity does not require an additional frame-delta multiplier. The Object must meet the Action’s target requirements; inspect its Collider and other movement Logic.
Check: test all four directions, a diagonal, opposite keys, and release to neutral. The same workflow must write zero to both velocity axes at neutral. A diagonal should remain within the configured speed. Compare against 2D Movement if movement or collision differs from input sampling.
Separate Context Activation From Game State
An Input Context’s Active at Start switch selects startup routing. More than one context can be active; their Commands and mappings are merged. Selecting a context in the editor only selects its configuration.
- Use Add Input Context to create
Menu. - Leave Menu Inactive at Start for a game that begins in ordinary gameplay.
- Enable Works While Paused for the context that must operate a pause panel.
- Add the required Button Commands and bindings to Menu. A context with no usable Commands cannot operate the panel merely because its pause policy is enabled.

- Works While Paused allows this context to receive input during game pause.
- Inactive at Start still requires a runtime activation.
Use Set Input Context Active to change routing during play. The Action changes one context without deactivating the others. A typical pause-panel handoff requires separate operations:
| Handoff | Configuration |
|---|---|
| Open the pause panel | Activate Menu; deactivate Gameplay if gameplay Commands should stop; run Set Game Paused with 1; show the intended UI. |
| Resume | Run Set Game Paused with 0; restore the intended gameplay context; deactivate Menu; close the UI. |
Set Game Paused controls simulation pause. A Game State named Paused is an enum value and does not perform this handoff. Works While Paused permits routing during pause; it does not activate the context. Live multiplayer pause has additional restrictions described in the Action reference.
Check: inspect Check Input Context Active, verify the Menu diagnostic during pause, and verify ordinary gameplay after resuming. Test both routes independently before assigning the same physical key to several active contexts.
A control already held when a context activates is gated until release. Release the key or mouse button, then activate it again when checking the newly active context. This prevents an opening input from immediately operating the destination panel.
Configure an Automatic Input Sequence
A sequence recognizes ordered inputs and emits a mapped Button Command. Its destination context must contain that result Command.
- In Gameplay, add a Button Command named
Unlock. No physical binding is required if only the sequence should emit it. - Switch Input Manager Mode to Input Sequences and select Add Input Sequence.
- Enter
Double Upas Input Sequence Name. Set Input Context and Result Command to Gameplay · Unlock; confirm creation. - Choose Physical Buttons as Step Source. Add two Add Keyboard or Mouse Step rows and record
Win each. - Choose Automatically under Matching and set Match Window (Seconds) to
0.5. - Attach a Command Pressed > Unlock diagnostic to a live Object. Start Debug Play and press, release, then press W again within half a second.
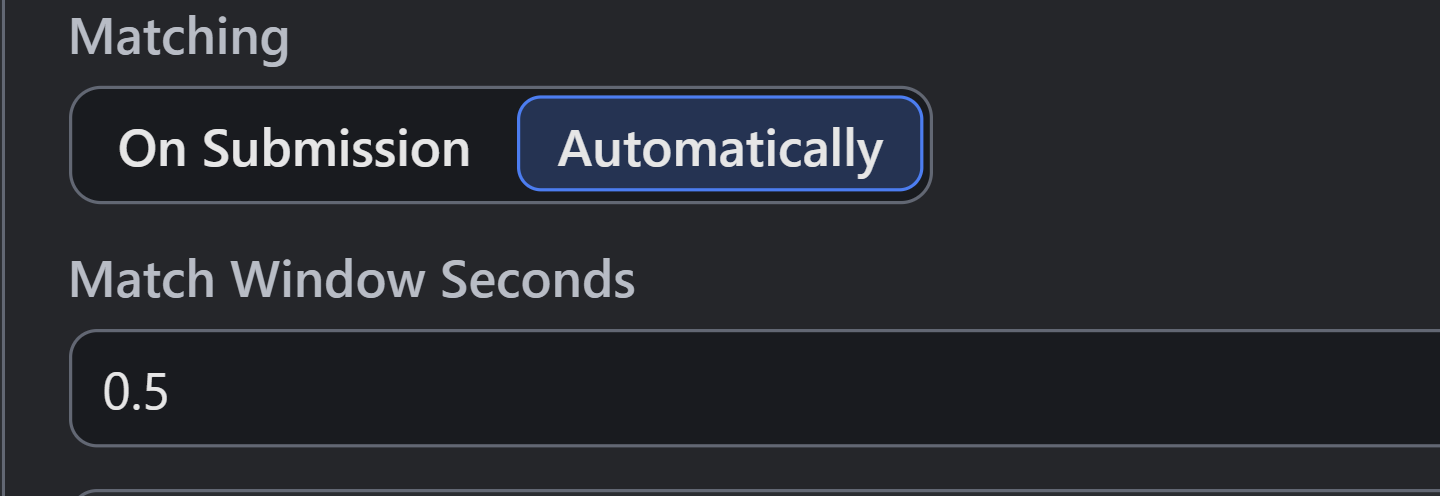
- Automatically matches a timed suffix without waiting for submission.
- Match Window: 0.5 seconds from the first matched step to the last.
Expected result: the active Gameplay context recognizes the timed W–W suffix and presses Unlock. Repeated steps require distinct activations, including a release between them. Test a single W, a different intervening input, a delay beyond the window, and an inactive context.
| Sequence Control | Meaning and Limits |
|---|---|
| Step Source: Commands | Records named Button Commands or typed axis directions. These can remain useful after physical remapping. |
| Step Source: Physical Buttons | Matches exact physical keyboard/mouse inputs. Changing Step Source clears existing steps. |
| Matching: Automatically | Continuously recognizes a timed suffix while the destination context is active; no recording-session Action is required. |
| Match Window (Seconds) | Automatic mode only; default 0.5, range 0.05–10, editor step 0.05. Measures the span from the first matched step to the last. |
| Matching: On Submission | Matches a complete recording session after submission; use the recording Actions below. |
| Step Count | At least one committed step for an enabled sequence; maximum 32. Blank recorder drafts are not committed steps. |
Configure Submitted Sequences
On Submission requires Start Input Sequence Mode. Its optional Input Context limits recording; blank records from active contexts. Starting again replaces the current recording session.
The global Input Sequence Submission setting selects After Idle Delay or Explicit Submit Only. Idle Delay defaults to 0.75 seconds, ranges from 0.05–10, and appears only for After Idle Delay. It applies to an active recording session after input; it does not replace the automatic matching window.
Use Submit Input Sequence for explicit submission, Clear Input Sequence to discard tokens while continuing recording, and Cancel Input Sequence Mode to stop without emitting a result. Verify a successful pattern and an unsuccessful pattern separately.
Inspect Conflicts and Persistence
Physical Buttons lists hard-coded physical routes created by direct Button Events. A physical input shared ambiguously between a direct Event and a named mapping can block Run and Publish. Inspect both routes; removing only a Command’s display name does not correct its binding.
Named binding conflicts can occur within a context. Duplicate sequence patterns and automatic prefix patterns also require review. Resolve each reported conflict, save, reopen, and repeat the device test. Clear Keyboard and Mouse Mappings affects the selected context’s authorable mappings; use a checkpoint or Undo before making a broad reset.
Troubleshooting
| Symptom | Diagnosis and Verification |
|---|---|
| No Command diagnostic | Check game focus, committed physical mapping, active context, eligible Event type, live Object, and enabled Logic attachment. |
| A Command is missing from an Event chooser | Match the Command’s Input Type to the Event and confirm its definition still exists. |
| One press creates repeated Objects | Inspect Held or continuous-axis execution; use Pressed and an appropriate admission condition for discrete creation. |
| Movement continues after release | Confirm a neutral 2D Axis sample writes zero to both velocities; inspect other movement workflows. |
| Menu input fails during pause | Activate Menu and enable Works While Paused; configure a live input workflow for that context. |
| Gameplay also responds in a menu | Inspect every active context and overlapping mappings; deactivation is a separate Action. |
| An automatic sequence fails | Check committed order, releases, active context, enabled sequence, destination Button Command, and Match Window. |
| A submitted sequence never finishes | Start a recording session; inspect idle versus explicit submission; verify the submit Action executes. |
| Switching Step Source removed the pattern | Rebuild the steps for the new source or recover the saved checkpoint. |
| Run reports an input conflict | Review Physical Buttons, named bindings, and sequence conflicts before retrying. |
Myth Engine Documentation